
Exploring the Essence of a Photographic Portfolio: A Comprehensive Guide
What Is a Photographic Portfolio?
How to Show Your Photographs Professionally
Professional photographers, or those aspiring to be, often encounter the challenging task of creating or updating their photographic portfolio, an endeavor that could be daunting yet rewarding. As a multi-faceted photographer myself, I understand how critical it is to have a cohesive portfolio that showcases my various skills and talents.

The Photographic Portfolio: An Overview
A photographic portfolio encapsulates your past work, highlighting your style, expertise, and vision. It can be digital or printed, showcasing the type of work you aspire to produce in the future. A well-curated portfolio serves as an effective marketing tool that exhibits your talent and area(s) of expertise to your target market.
Why Create a Photographic Portfolio?
Even if commercial photography isn't your primary goal, crafting a portfolio is still beneficial. This collection of your best work presents an opportunity for self-assessment and reflection. It also initiates a dialogue between you and your audience about your artistic mission.
When I embarked on the journey of curating my portfolio, I sought assistance from industry expert Sally Brownbill from The Brownbill Effect. Her guidance was invaluable, not only for her insights into what the industry is looking for but also for her keen eye in helping me curate my work.
Step 1: Selection
Having an organized workflow is crucial at this stage. I utilized Lightroom to manage, catalogue, and select my images. After going through all the images, I had approximately 400 portfolio-worthy images spanning various genres. But what next?

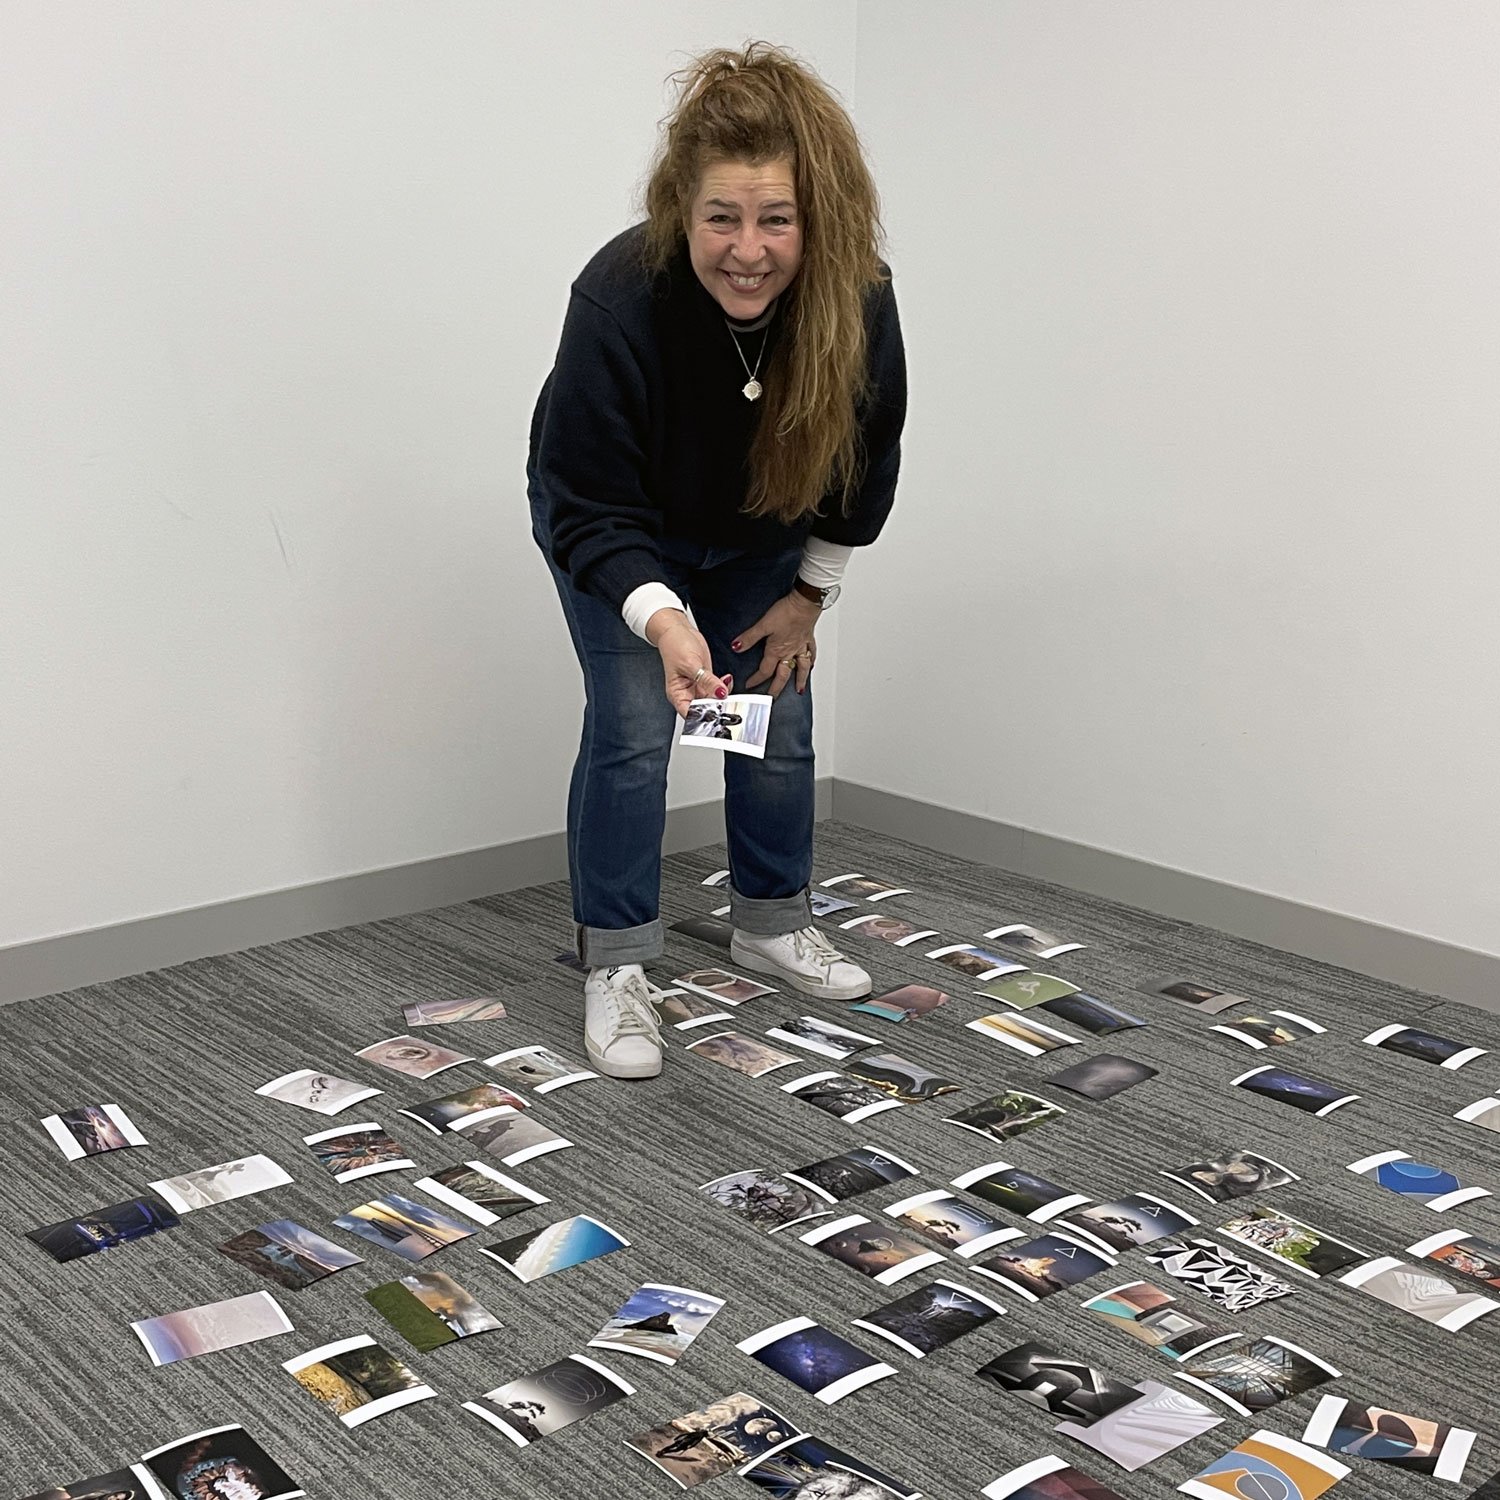
STEP #2 : PRINT
I exported them to 6 x 4 images and went to Officeworks, it wasn’t about the colour (yes the colour is terrible), it was theme, style, composition that were the keys in this process. Meeting up with Sally, she has a chat with me about, what my direction is… Who knows? We laid all the images out on the floor, which ended up being a great exercise in itself. I started to realise certain traits about my work.
I shoot / crop a lot of images to square 1 : 1 format (yes I was aware of this),
I center a lot of the major elements in my images (yes I knew this too),
but….
approx 50% of my images were black and white,
I shoot a lot of architecture, interior and exteriors
Not many images had vibrant pops of colour, I am very restrained in colour,
Very few landscape at sunrise/sunset most through the day.
Step 3: Sort
With Sally's help, we began seeing patterns, colours, and shapes, linking photographs. Her ability to pick out my most potent images and pair them was instrumental. She asked questions about my work, helping forge links between genres.
Accepting criticism is a vital part of this process. What you perceive as your best work may differ from industry expectations. Be open to feedback—it only makes you a better photographer!
Step 4: Layout and Colour Grade
After sorting, we discussed the layout of my portfolio, considering aspects like cropping, tones, saturation, and composition. Using Adobe InDesign, I laid out all the images and started addressing issues in colour and style.
Creating a photographic portfolio is a meticulous process that requires patience, creativity, and an open mind. Remember, a well-crafted portfolio is more than just a collection of images—it reflects your artistic journey and is a testament to your growth as a photographer.
Step 5: Feedback
After finalizing the images and meticulously arranging them into spreads, I sought feedback from Sally, the industry professional who had been my guiding light throughout this process. She revisited the layout and color grading to ensure the portfolio flowed seamlessly.
Asking probing questions like, "Do these images still work? Can any be replaced with better ones?" helped refine the portfolio. I also turned to other mentors for their insights. "What do you think is missing? What would you change?" Their perspectives were invaluable in honing my portfolio.
Step 6: Print
Now comes the fun part—printing the final copy. This step involves making exciting decisions about the format of the portfolio. Should it be a collection of fine art prints housed in a handmade leather portfolio? Or should I collaborate with a company like Momento to transform my portfolio into a fine art book?
The type of paper used can significantly impact the overall look and feel of the portfolio. Should I go for a matte finish or opt for glossy prints? These are the enjoyable decisions that bring your work to life in tangible form.
In conclusion, creating a photographic portfolio is an immersive journey of self-discovery and artistic evolution. It offers a fresh perspective on your work, style, editing techniques, themes, composition, and color perception. Don't hesitate to seek professional advice—pay for a mentor's time and expertise. Be open to criticism; it's essential for growth.
Creating this portfolio was a learning experience like no other. I discovered how various genres could blend seamlessly, creating a captivating flow that piqued interest. And I owe a great deal of gratitude to Sally for her guidance and patience throughout this process.
Stay tuned for the final result—it's going to be worth the wait!